 Worlds
Exclusive Product!
Worlds
Exclusive Product! |
|
|
|

|
|

|
Only 10 minutes, one Philips type screwdriver and a pair
of pincers required for the installation of Lusifer mod!
With simple Plug&Play actions (No-Sodlering),
you may now hack your brand new Play$tation2, allowing original imports
and backups to be loaded
with Swap Magic Disks and 1 easy swap!
Are U gonna Risk it with Soldering?
|
|

|
The installation of Lusifer mod in V9/V10 consoles will be performed
by a 15 years old girl, called L1:
"I managed to install L-mod V9 in less than 10 minutes
and I will show you how easy it is!
Meanwhile, for any damage you may cause in your PS2,
you are responsible about that, Don't blame me..."
|
|

|
|

|
Use the Philips type screwdriver to unscrew the 8 screws
that are hiding under the 8 plastic pads,
from the bottom side of PS2 console.
|
|

|
Lift the Top cap of PS2.
Warning: By opening your PS2 console,
you are voiding the quarantee shield!
|
|

|
Unscrew 2 screws that are holding
Joystic/Memory socket.
|
|

|
Unscrew 2 screws that are holding
the Ventilator.
Warning: 1 screw is hiding, underneath
Power Switch!
|
|

|
Put the Top cap back in its place
and remove the Bottom cap.
|
|

|
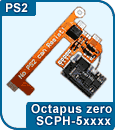
Now remove all parts metal parts and you will see 2 Ribbon
Cables, where Octapus (G3 Plug-In) will be plugged into!
|
|

|
Disconnect those 2 Ribbon Cables from P$2 mainboard and
remove the one that is connected to Eject/Reset Buttons.
|
|

|
Plug the Ribbon Cable of to G3 Plug-In connector, keeping
the right directions shown in the photo.
|
|

|
Plug G3 Plug-In to P$2 mainboard, by pressing it smoothly
into the connectors. Ensure that G3 Plug-In edges are properly connected.
|
|

|
Plug G3 Plug-In edge to Eject/Reset Buttons.
|
|

|
Put back all parts in their place and hold Eject Button
continuously, to check Lusifer mod fanctionality.
If everything is ok, the DVD-Rom tray will automatically open
and installation has successfully finished!
|
| |
